How to create video guides
Introduction
Mirillis Action! provides powerful and easy to use features that allow you to create great video guides. You can create a video guide or a tutorial about anything you can do on your PC and add your voice over and special effects to make it look more appealing for your audience.
With an exceptionally high frame rate, Action! can help you create true HD quality and smooth videos. You can easily add commentary with your microphone to create fantastic video guides. With just a click you can export your video guides to YouTube or Facebook.
You can even add a video from your webcam, add commentary to that with microphone and combine everything into one great HD video guide.
Action! supports a wide variety of high resolution and high definition video recording modes. Starting from 240p, through 720p and 1080p up to to 4k / ULTRAHD video recordings.
To create video guides, you can use two different recording modes: fullscreen recording mode or selected desktop region recording mode.
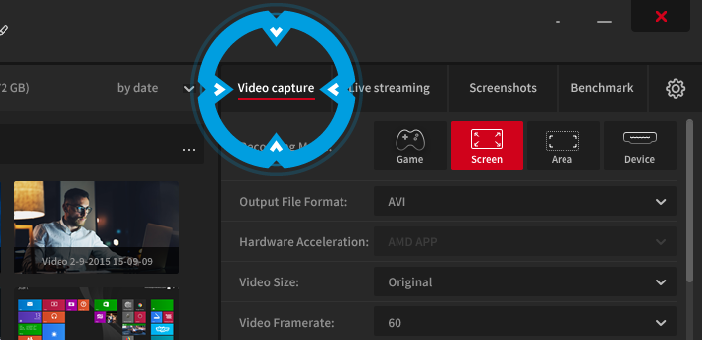
To record fullscreen select the Active Screen recording mode.
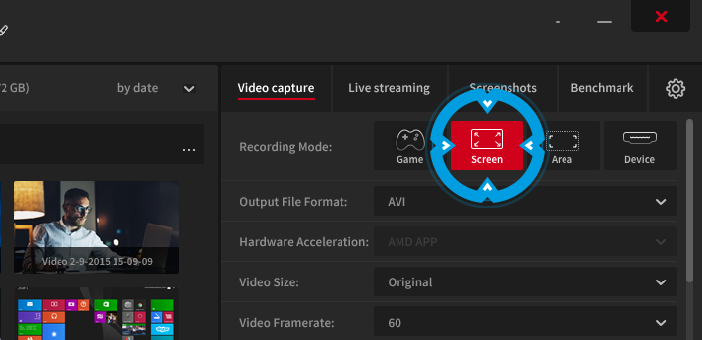
If you want to record just a specific area of your desktop into your video guide, then select the Active desktop region/area recording mode.

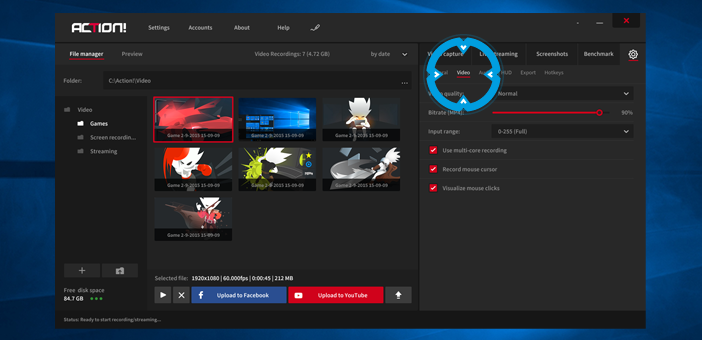
Video guide recording configurations
On the Video Capture/Recording tab you can set the video recording file format, video size, framerate and you can also decide how the voice over effect would be added to your video guides.
Action! allows you to record videos in the format of your choice. From the drop down menus you can select the following options:
- AVI
- MP4
- MP4 with various hardware acceleration technologies, including NVIDIA NVENC, AMD APP and Intel QuickSync Video
Video size option allows you to specify the resolution of the recorded video guide. It has the following options to choose from:
- Original
- 1080p
- 720p
- 480p
- 360p
- 240p
Please note that higher resolutions would result in better video quality but also bigger output file size.
The Video framerate allows you to set the frame rate for the recorded video guide. Video framerate controls how smooth your video guide will be. The higher is framerate then more smooth the video guide will be.
The duration option allows you to set a predefned duration of your video recording.
Video Recording Settings
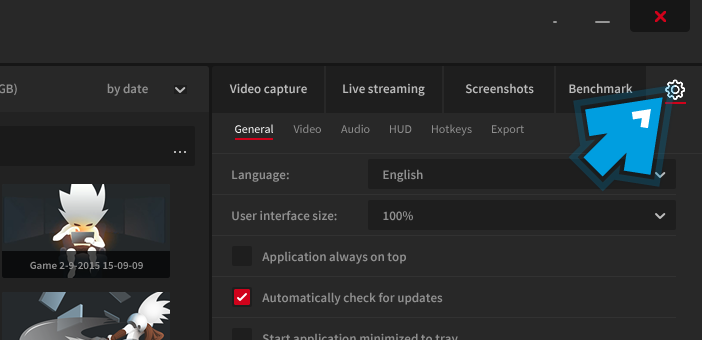
For more advanced video recording settings open Mirllis Action! Settings and select Video Recording Settings. Here you can set more advanced video recording related settings or enable visualize mouse clicks option.
Video Quality Settings

The video quality recording has three modes.
- Normal
- Low
- High
By default, all videos are recorded with Normal video quality. You change this setting to the Low and High quality depending on your requirements. Please note that better quality results in bigger video file size.
Selecting bitrate for video guide recording
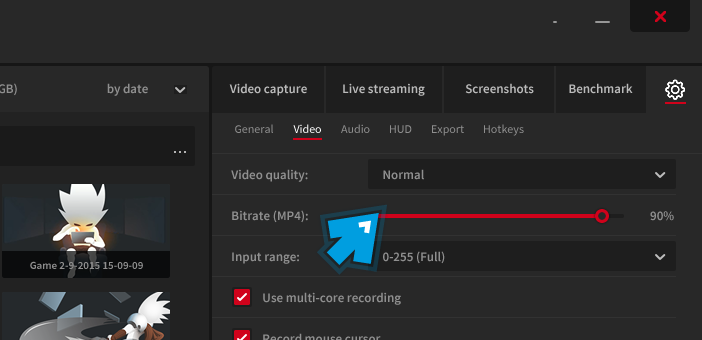
With Bitrate option you can adjust the bitrate of your MP4 file format recordings. A higher bitrate means bigger output file size but also a better video quality. To set custom bitrate please use the slider.
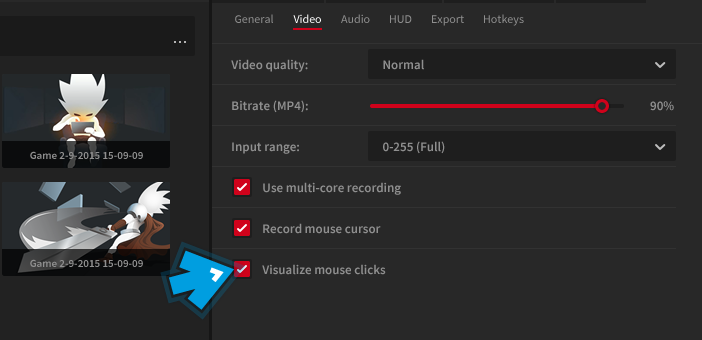
Mouse click visualizations in video guide recordings
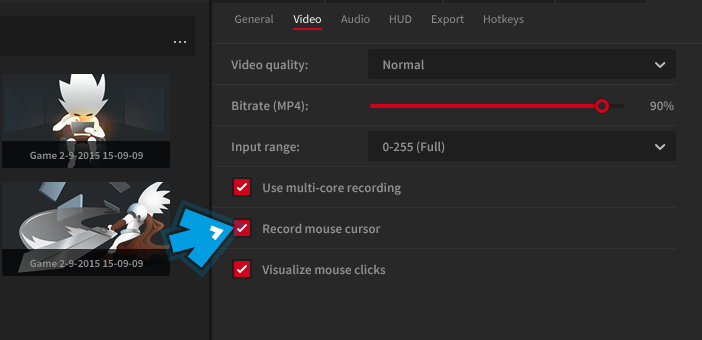
In video guides one of the most important things is to demonstrate various features or actions using a mouse cursor. Recording your mouse cursor is a key feature for most of video guides.With Action! you can also add animated mouse click visualizations to make things even more clear for your audience.
Microphone recording
Action! allows you to add audio commentary to your recorded video guides. The microphone recording can be turned on or off from the main Video capture/recording tab.
More advanced microphone recording options can be found in Action! microphone settings window.
The microphone recording option has a few options:
- Always record
- Record on button down
- Record on button down (on/off)
Using graphics overlay in your video guides
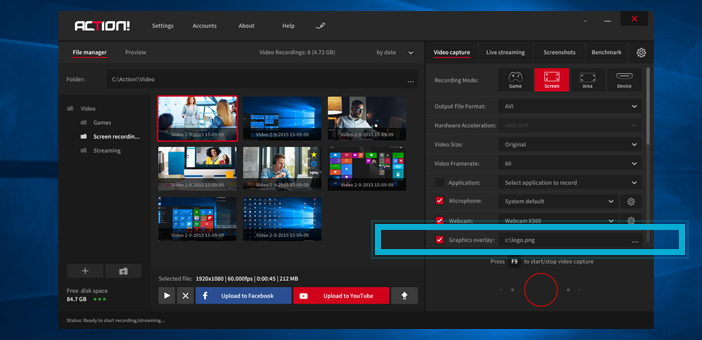
The graphics overlay option allows you to place your logo, trademark or any other information on top of your video like a watermark. Open additional Overlay graphics settings window to select the position where overlay graphic image will be placed or simply switch Action! to Preview mode and use Draggable mode to adjust your graphics size and position!
Adding Webcam to video guides recordings
Enhance your interaction with audience by adding a webcam picture to your video guides. The webcam settings allow you to easily add a picture from webcams to your video guides.
Check main Video capture/recording tab to select webcam device and turn the webcam recording on or off. Using options available in additional Webcam settings window you can set webcam recording mode with a few options available:
- Always record
- Record on button down
- Record on button down (on/off)
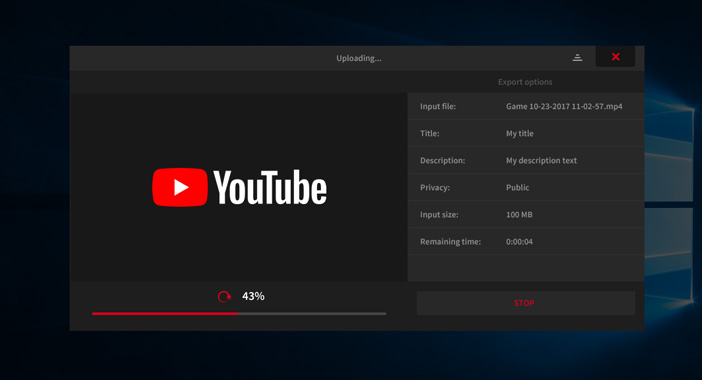
Exporting video guides to YouTube
When your video guide recording is ready you can easily export it to YouTube using a dedicated YouTube button available under Action! recordings list.